Introduction
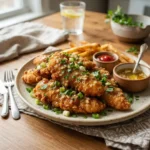
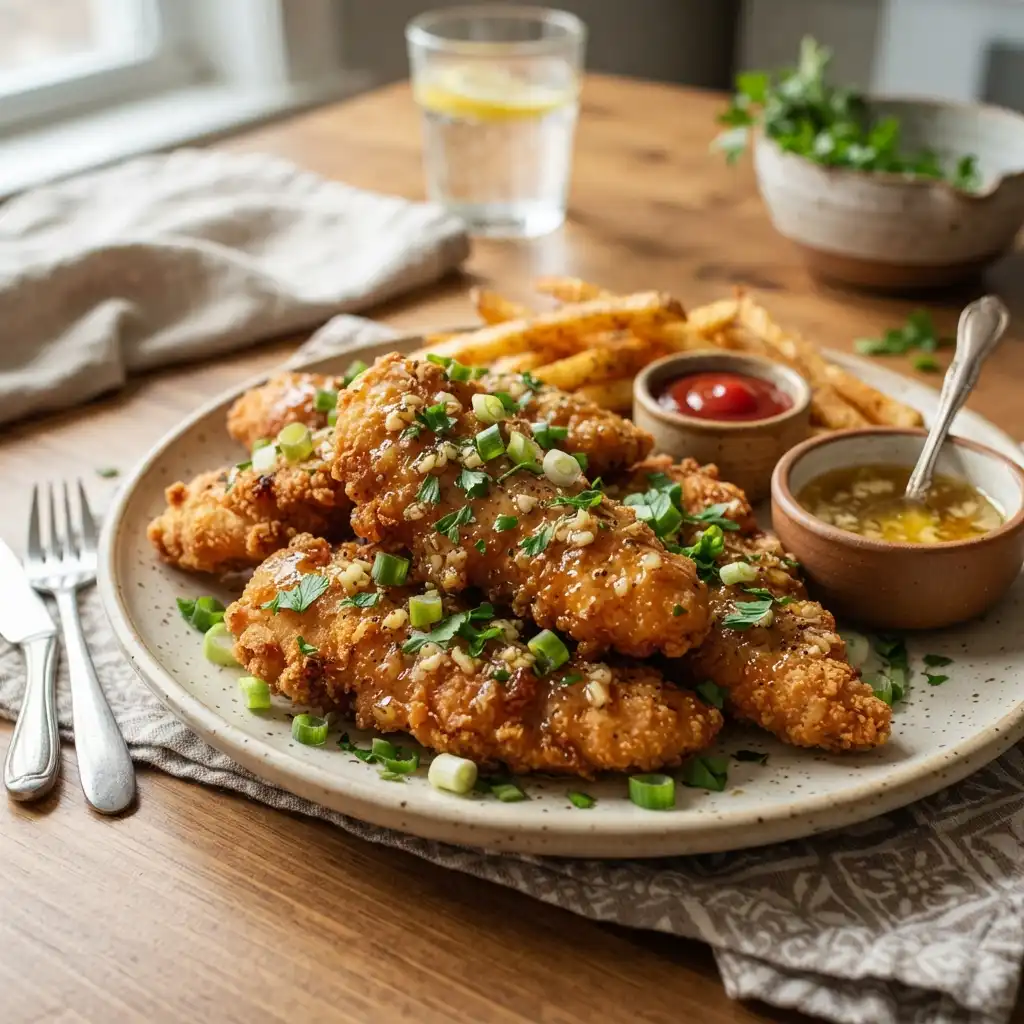
There are few culinary experiences quite as satisfying as biting into a piece of chicken that offers the perfect duality of textures: a shattering, golden-brown exterior giving way to succulent, steaming white meat on the inside. When you elevate that experience with a glaze that balances the floral sweetness of honey, the rich creaminess of butter, and the pungent, savory kick of fresh garlic, you transcend a simple dinner and enter the realm of comfort food royalty. These Crispy and Juicy Honey Butter Garlic Chicken Tenders are not just a recipe; they are a symphony of flavor profiles designed to delight the palate.
Whether you are hosting a game night, looking for a weeknight dinner that feels like a treat, or simply craving that specific crunch that only a well-fried tender can provide, this recipe delivers. The secret lies in the specific ratio of coating ingredients and the temperature control during frying, ensuring that the honey butter garlic sauce clings to every nook and cranny without making the crust soggy. Prepare to make this dish your new signature staple.
The History
To truly appreciate the honey butter garlic chicken tender, one must look at the converging culinary roads that led to its creation. The concept of the “chicken tender” itself is a relatively modern American invention. Historically, the tenderloin was often discarded or used for stock, considered a scrap cut compared to the breast or thigh. However, in the mid-20th century, particularly in the Southern United States, fried chicken strips began to gain popularity in diners and fast-food establishments, eventually evolving into the breaded “tender” we know today.
The flavor profile, however, draws heavy inspiration from Asian-American cuisine and the global explosion of Korean Fried Chicken (KFC). In the 1990s and 2000s, Korean cuisine popularized the technique of double-frying chicken to achieve an ultra-crispy skin that could hold up to heavy, sticky sauces without losing its crunch. The combination of honey, garlic, and soy is a classic staple in Korean cooking (often seen in Dakgangjeong), while the addition of butter adds a Western richness often found in American “garlic butter” shrimp or steak preparations. This recipe is a beautiful fusion of Southern frying techniques and Eastern flavor profiling, creating a global comfort food hybrid.
Ingredients Breakdown
Understanding the function of each ingredient is the key to mastering this recipe. We aren’t just throwing things in a bowl; we are engineering texture and flavor.
The Chicken
Chicken Tenderloins: While you can cut chicken breasts into strips, using actual tenderloins is superior for this recipe. They are naturally uniform in size, ensuring even cooking. They are also more tender than breast meat because the muscle fiber is looser.
The Marinade & Binder
Buttermilk: This is non-negotiable for juiciness. The acidity in buttermilk breaks down the proteins in the chicken, tenderizing the meat while infusing it with a subtle tang. It also acts as a glue for the flour coating.
Eggs: Added to the buttermilk to create a thick, custard-like binder that ensures the breading adheres aggressively to the meat.
The Crunchy Coating
All-Purpose Flour: Provides the structure and body of the crust.
Cornstarch: This is the secret weapon. Replacing a portion of the flour with cornstarch inhibits gluten formation, resulting in a lighter, crispier, and “shatter-like” texture rather than a bread-like chew.
Paprika & Garlic Powder: Seasoning the flour itself ensures that every bite is flavorful, not just the surface.
The Honey Butter Garlic Glaze
Unsalted Butter: We use unsalted to control the sodium levels, as the soy sauce provides plenty of salt. Butter adds a velvety mouthfeel that oil cannot replicate.
Honey: Provides the sweetness and the sticky viscosity needed to coat the tenders. Light honey is preferred so it doesn’t overpower the garlic.
Fresh Garlic: Minced fresh garlic is essential. Powdered garlic in the sauce lacks the aromatic punch needed to cut through the sweetness of the honey.
Soy Sauce: Adds umami and saltiness, balancing the high sugar content of the honey.
Step-by-Step Recipe
Phase 1: Preparation and Marination
- Prep the Chicken: Pat your chicken tenderloins completely dry with paper towels. Moisture is the enemy of crispiness. If there is excess water on the surface, the steam will prevent the crust from browning properly.
- Create the Marinade: In a large bowl, whisk together the buttermilk, eggs, and a pinch of salt. Submerge the chicken tenders in this mixture.
- The Wait: Cover the bowl and refrigerate for at least 30 minutes, though 2 to 4 hours is ideal. This allows the enzymes in the buttermilk to work their magic on the muscle fibers.
Phase 2: The Breading Station
- Mix Dry Ingredients: In a shallow dish or a large paper bag, combine the all-purpose flour, cornstarch, paprika, garlic powder, onion powder, salt, and black pepper. Whisk thoroughly to distribute the spices evenly.
- Dredge: Remove a tender from the buttermilk, allowing the excess to drip off slightly. Place it into the flour mixture. Press the flour firmly into the meat. For an extra craggy crust, dip it back into the buttermilk quickly and then back into the flour for a “double dredge.”
- Rest the Breading: Place the breaded tenders on a wire rack and let them sit for 10 minutes. This helps the coating hydrate and stick, preventing it from falling off in the fryer.
Phase 3: Frying to Perfection
- Heat the Oil: Fill a heavy-bottomed pot (like a Dutch oven) with about 3 inches of vegetable or canola oil. Heat the oil to 350°F (175°C). Use a thermometer; guessing the temperature often leads to greasy or burnt chicken.
- Fry in Batches: Carefully lower 3-4 tenders into the hot oil. Do not overcrowd the pot, or the oil temperature will drop, causing the chicken to absorb oil rather than fry.
- Monitor Color: Fry for about 3-4 minutes per side until they are a deep golden brown and the internal temperature reaches 165°F (74°C).
- Drain: Remove the chicken and place them on a wire rack set over a baking sheet. Do not place them on paper towels, as this traps steam and makes the bottom soggy.
Phase 4: The Glaze
- Sauté Garlic: In a large skillet over medium heat, melt the butter. Add the minced garlic and sauté for 1-2 minutes until fragrant but not browned.
- Create the Sauce: Stir in the honey, soy sauce, and a splash of rice vinegar. Bring to a simmer and let it bubble for 2 minutes until it thickens slightly into a syrup.
- Toss: Turn off the heat. Toss the hot, crispy fried tenders into the skillet, gently coating them in the glaze. Serve immediately.
Tips
- Oil Temperature is King: If your oil is too cool, the chicken will be greasy. If it’s too hot, the outside will burn before the inside cooks. Maintain that 350°F sweet spot.
- The Wire Rack Rule: Always drain fried foods on a wire rack, not paper towels. Paper towels trap heat and moisture, turning your crispy crust into a soft, sad soggy mess.
- Garlic Timing: Be very careful not to burn the garlic in the sauce. Burnt garlic tastes bitter and will ruin the sweet profile of the honey. If the garlic browns too fast, add the honey immediately to cool the pan down.
- Make Ahead: You can bread the chicken up to 24 hours in advance and keep it on a rack in the fridge. Fry them just before serving for the best texture.
Variations and Customizations
Spicy Honey Garlic
For those who like heat, add 1 tablespoon of Gochujang (Korean chili paste) or Sriracha to the glaze. The heat pairs beautifully with the sweet honey.
Lemon Pepper Twist
Skip the honey glaze. Instead, toss the fried tenders in melted butter, fresh lemon juice, and a generous amount of coarse lemon pepper seasoning and parsley.
Air Fryer Method
To make this healthier, spray the breaded tenders generously with oil spray and cook in an air fryer at 400°F (200°C) for 10-12 minutes, flipping halfway through. Note that the crust will be slightly less “shattery” than deep-fried but still delicious.
Gluten-Free
Swap the all-purpose flour for a 1:1 Gluten-Free baking flour blend and ensure your soy sauce is replaced with Tamari or Coconut Aminos.
Health Considerations and Nutritional Value
It is important to acknowledge that this is an indulgent dish. Deep-frying adds significant calories and fat content. A standard serving of 4-5 tenders with the glaze can range between 600 to 800 calories, depending on the size of the chicken and the amount of oil absorbed.
Protein: Chicken tenders are an excellent source of lean protein, essential for muscle repair and satiety.
Sugar: The primary health concern in this recipe is the sugar content from the honey glaze. To mitigate this, you can reduce the honey quantity by 25% or use a sugar-free honey substitute.
Sodium: Between the soy sauce and the salted butter, sodium levels can be high. Using low-sodium soy sauce and unsalted butter helps manage this.
Balancing the Meal: To create a nutritionally balanced plate, serve these tenders with a large portion of steamed broccoli, a fresh green salad with a vinaigrette, or roasted Brussels sprouts to add fiber and micronutrients.
Ingredients
- Chicken: 1.5 lbs chicken tenderloins
- Marinade: 1 cup buttermilk, 1 large egg
- Dry Coating: 1 cup all-purpose flour, 1/2 cup cornstarch, 1 tsp paprika, 1 tsp garlic powder, 1 tsp onion powder, 1 tsp salt, 1/2 tsp black pepper
- Frying: Vegetable or Canola oil for deep frying
- Glaze: 4 tbsp unsalted butter, 1/3 cup honey, 4 cloves garlic (minced), 2 tbsp soy sauce, 1 tsp rice vinegar, sesame seeds and chopped green onions for garnish
Directions
- Soak chicken tenders in buttermilk and egg mixture for at least 30 minutes in the fridge.
- Combine flour, cornstarch, and spices in a shallow dish. Dredge chicken in the flour mixture, pressing firmly. Let rest on a rack for 10 minutes.
- Heat oil in a deep pot to 350°F (175°C).
- Fry chicken in batches for 3-4 minutes per side until golden brown and cooked through (165°F internal temp). Drain on a wire rack.
- In a large skillet, melt butter over medium heat. Add minced garlic and cook for 1 minute until fragrant.
- Stir in honey, soy sauce, and rice vinegar. Simmer for 2 minutes until slightly thickened.
- Toss fried chicken in the glaze until fully coated. Garnish with sesame seeds and green onions. Serve hot.
FAQ
Can I bake these instead of frying?
Yes. Place the breaded tenders on a wire rack over a baking sheet. Spray generously with cooking oil. Bake at 425°F (220°C) for 15-20 minutes, flipping halfway through, until golden and cooked through.
Why did my breading fall off?
This usually happens if the chicken wasn’t dried before marinating, or if you didn’t let the breaded chicken rest before frying. The “resting” period allows the flour to absorb the moisture from the buttermilk, creating a cement-like bond.
Can I freeze the leftovers?
You can freeze the fried chicken (without the sauce) for up to 3 months. Reheat in the oven or air fryer to restore crispiness. Do not freeze the chicken once it has been tossed in the sauce, as it will become mushy upon thawing.
What oil is best for frying?
You need an oil with a high smoke point. Canola, vegetable, peanut, or avocado oil are excellent choices. Avoid olive oil or butter for the frying process as they will burn at the required temperatures.
Summary (in two lines)
These Honey Butter Garlic Chicken Tenders feature a secret cornstarch-infused crust for maximum crunch, tossed in a sticky, savory-sweet glaze. Perfect for game nights or family dinners, they deliver a restaurant-quality meal right in your own kitchen.