Introduction
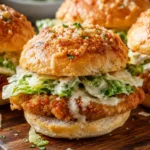
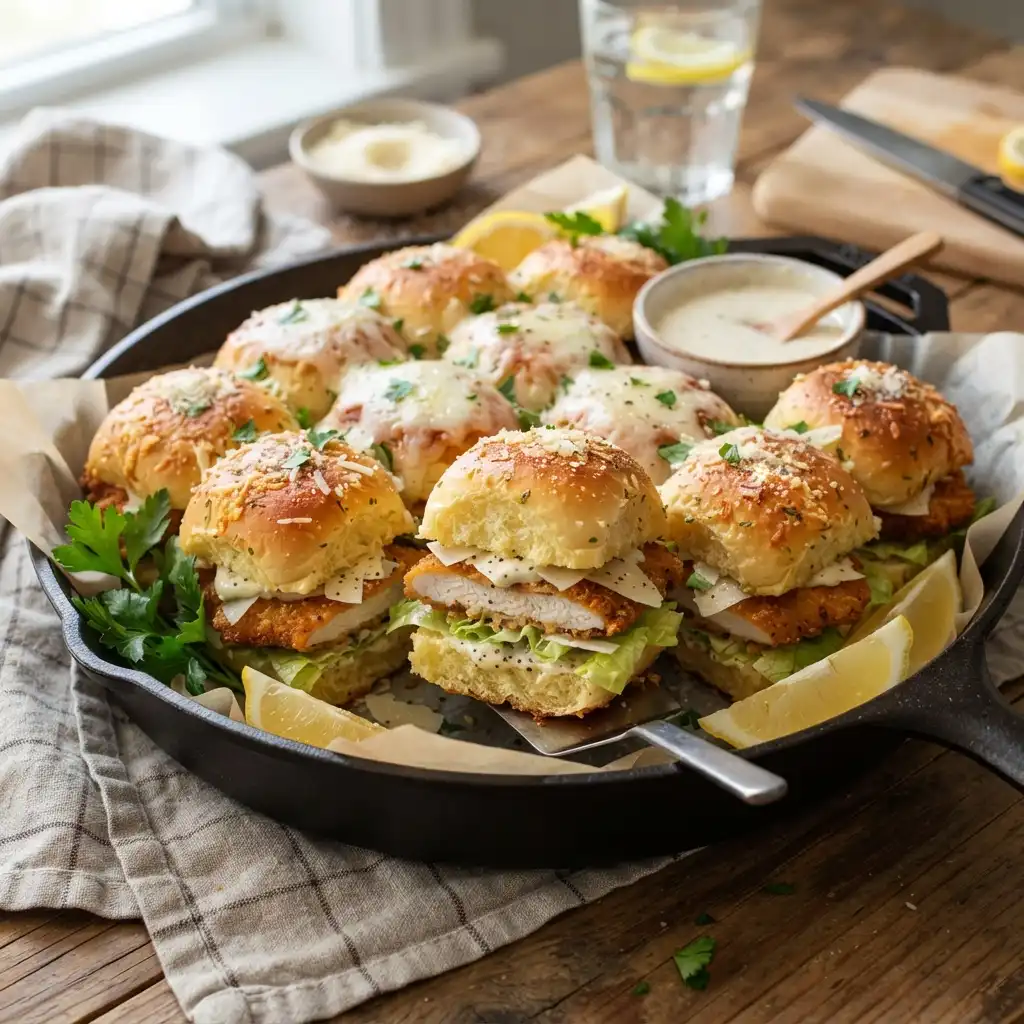
There is a specific kind of magic that happens when warm, golden-brown bread meets crispy, seasoned poultry and a lush, creamy dressing. The Irresistible Crispy Chicken Caesar Sandwich Sliders on Parmesan Rolls are not merely a meal; they are an experience designed to delight the senses and satisfy even the heartiest of appetites. Imagine biting into a soft, cheesy roll that gives way to a shard of crunchy chicken, followed immediately by the tangy, umami-rich punch of classic Caesar dressing and a melt of mozzarella or provolone. This recipe bridges the gap between gourmet dining and comfortable finger food, making it the perfect centerpiece for game day gatherings, weekend parties, or a luxurious weeknight dinner that feels like a treat.
In a world where quick meals often sacrifice flavor for convenience, these sliders stand out by prioritizing texture and depth. The use of Parmesan rolls adds a nutty, savory foundation that complements the salty notes of the Caesar dressing, while the crispy chicken provides the necessary crunch that defines a truly satisfying sandwich. Whether you are feeding a crowd of twelve or preparing a batch for meal prep, this recipe is scalable, customizable, and guaranteed to become a staple in your culinary repertoire. Get ready to elevate your slider game to new heights with this comprehensive guide.
The History
To truly appreciate the Crispy Chicken Caesar Slider, one must understand the lineage of its components. The Caesar salad, the spiritual ancestor of this sandwich, was invented by Caesar Cardini, an Italian immigrant restaurateur in Tijuana, Mexico, in 1924. Legend has it that during a busy Fourth of July weekend, Cardini was low on supplies and improvised a salad using what he had on hand: romaine lettuce, garlic, croutons, Parmesan cheese, boiled eggs, olive oil, and Worcestershire sauce. He prepared it tableside with a dramatic flair that captivated his patrons, including Hollywood stars, turning a simple salad into a global phenomenon.
The concept of the “slider,” however, has different roots. The term is widely believed to have originated in the 1920s or 1930s in the United States, often associated with White Castle hamburgers. The name “slider” was coined because the burgers were so greasy and small that they seemed to “slide” down your throat effortlessly. Over the decades, the slider evolved from a cheap fast-food item to a gourmet vessel for all kinds of fillings, from pulled pork to shrimp. Fusion cuisine in the late 20th and early 21st centuries began marrying these concepts, taking the structural integrity of the slider and filling it with the flavors of classic salads. The addition of Parmesan rolls is a modern twist, leveraging the popularity of artisanal breads to add a layer of sophistication to the humble slider, creating the hybrid masterpiece we enjoy today.
Ingredients Breakdown
Understanding the role of each component is crucial for mastering this recipe. Here is a deep dive into why we choose specific ingredients for the Irresistible Crispy Chicken Caesar Sandwich Sliders.
The Parmesan Rolls
The foundation of any great sandwich is the bread. Parmesan rolls are selected for their distinct flavor profile; they are slightly denser than standard hamburger buns but remain soft on the interior. The baked Parmesan cheese on the crust provides a salty, nutty crunch that mimics the croutons found in a traditional Caesar salad. If you cannot find specific Parmesan rolls, Hawaiian rolls can be used for sweetness, but the savory note will be lost.
The Chicken
We recommend using chicken thighs for this recipe rather than breasts. Thighs have a higher fat content, which ensures the meat remains juicy even after being breaded and fried or baked. The moisture inside the chicken contrasts beautifully with the crispy exterior. However, if you prefer leaner meat, chicken breasts can be pounded to an even thickness to ensure uniform cooking.
The Breading
A triple-dredge method is often used for maximum crispiness. This involves coating the chicken in flour, then egg wash, and finally a mixture of panko breadcrumbs and grated Parmesan cheese. Panko breadcrumbs are Japanese-style crumbs that are larger and airier than standard breadcrumbs, resulting in a lighter, crunchier texture that stays crispier for longer.
The Caesar Dressing
While store-bought dressing is convenient, a homemade Caesar dressing elevates the sliders significantly. The emulsion of olive oil, egg yolk (or mayonnaise base), garlic, lemon juice, anchovies, and Parmesan cheese creates a complex flavor profile. The acidity cuts through the richness of the fried chicken, balancing the overall bite.
The Cheese
Provolone or Mozzarella are the top choices for melting. Provolone offers a sharper taste that stands up to the garlic and anchovy notes, while Mozzarella provides a mild, stretchy texture that binds the slider together. Avoid hard cheeses like aged Parmesan for the melting layer, as they do not melt smoothly.
Step-by-Step Recipe
Follow this detailed workflow to ensure every slider comes out perfect. This process includes preparation, cooking, assembly, and finishing touches.
Phase 1: Preparation
Begin by gathering all your ingredients. Mise en place is essential when frying chicken to prevent burning the oil while searching for spices. Preheat your oven to 375°F (190°C) if you plan to bake the chicken, or heat your frying oil to 350°F (175°C). Prepare three shallow bowls for the breading station: one with all-purpose flour seasoned with salt and pepper, one with beaten eggs mixed with a splash of water, and one with panko breadcrumbs mixed with grated Parmesan cheese and Italian seasoning.
Phase 2: Cooking the Chicken
Cut your chicken thighs into slider-sized portions. Dredge each piece in the flour, shaking off the excess. Dip into the egg wash, ensuring full coverage. Finally, press firmly into the breadcrumb mixture, ensuring an even coat. If frying, cook for 3-4 minutes per side until golden brown and the internal temperature reaches 165°F (74°C). If baking, place on a wire rack over a baking sheet and cook for 20-25 minutes, flipping halfway through, until crispy.
Phase 3: Assembly
Slice your Parmesan rolls in half horizontally. Place the bottom halves on a baking sheet. Layer each roll with a piece of crispy chicken. Drizzle generously with Caesar dressing. Top with a slice of Provolone or Mozzarella cheese. Place the top half of the roll over the cheese. Brush the tops of the rolls with melted butter mixed with garlic powder and parsley for a golden finish.
Phase 4: The Melt
Place the assembled sliders in the oven for 5-7 minutes. The goal here is not to cook the chicken further but to melt the cheese and warm the bread without making it soggy. Once the cheese is bubbly and the bread is toasted, remove them from the oven. Let them rest for two minutes before slicing into individual sliders and serving.
Tips
- Prevent Sogginess: The enemy of the crispy chicken slider is moisture. To prevent the bread from becoming soggy, create a barrier. Place a leaf of romaine lettuce on the bottom bun before adding the chicken, or apply a thin layer of butter to the bun before adding the dressing.
- Oil Temperature: If frying, invest in a cooking thermometer. If the oil is too cool, the chicken will absorb grease; if too hot, the outside will burn before the inside cooks.
- Make Ahead: You can bread the chicken hours in advance and keep it covered in the refrigerator. This allows the breading to adhere better during cooking.
- Cheese Selection: For a sharper flavor profile, use smoked Provolone. For a creamier texture, use low-moisture Mozzarella.
- Garlic Butter Brush: Do not skip the garlic butter brush on the tops of the rolls. This adds aroma and ensures the top of the slider is as flavorful as the inside.
- Resting Time: Let the fried chicken rest on a wire rack, not paper towels, after cooking. Paper towels can trap steam and soften the crust.
Variations and Customizations
One of the joys of cooking is making a recipe your own. Here are several ways to customize your Crispy Chicken Caesar Sliders.
Spicy Kick
Add cayenne pepper or crushed red pepper flakes to your breading mixture. Alternatively, mix a tablespoon of hot sauce or sriracha into your Caesar dressing to create a spicy Caesar variant that cuts through the richness of the cheese.
Bacon Lover’s Edition
There is no rule against adding more protein. Crumble crispy cooked bacon over the chicken before adding the cheese. The smokiness of the bacon pairs exceptionally well with the Parmesan rolls.
Gluten-Free Option
To make this recipe gluten-free, substitute the all-purpose flour with a gluten-free flour blend and use gluten-free panko breadcrumbs. Ensure your Parmesan rolls are sourced from a gluten-free bakery, or use gluten-free Hawaiian rolls as a substitute.
Vegetarian Twist
Replace the chicken with breaded cauliflower florets or thick slices of fried eggplant. The Caesar flavor profile works surprisingly well with vegetables, provided they are cooked until tender.
Extra Greens
For a fresher take, chop fresh romaine lettuce hearts and toss them in a little extra dressing. Place a small mound of this dressed lettuce on top of the cheese before closing the slider for added crunch and freshness.
Health Considerations and Nutritional Value
While these sliders are indulgent, understanding their nutritional profile helps in managing portion sizes and making informed dietary choices. A single slider typically contains between 250 to 350 calories, depending on the size of the chicken portion and the amount of dressing used.
Macronutrients
The primary source of protein is the chicken, which provides essential amino acids for muscle repair. The breading and rolls contribute carbohydrates, providing energy. The cheese, oil, and dressing contribute fats, which are necessary for nutrient absorption but should be consumed in moderation.
Sodium Content
Caesar dressing, Parmesan cheese, and cured meats like bacon are high in sodium. To reduce sodium intake, make your own dressing where you can control the salt levels, and use low-sodium cheese varieties.
Healthier Swaps
To lighten the recipe, consider air-frying the chicken instead of deep-frying or baking with an oil spray. This can reduce the fat content by up to 50%. You can also use a yogurt-based Caesar dressing instead of an oil-based mayonnaise dressing to reduce calories. Choosing whole wheat Parmesan rolls can also increase the fiber content, aiding in digestion.
Ingredients
- 12 Parmesan dinner rolls, sliced in half horizontally
- 1.5 lbs boneless, skinless chicken thighs, cut into slider-sized portions
- 1 cup all-purpose flour
- 2 large eggs, beaten
- 2 cups Panko breadcrumbs
- 1/2 cup grated Parmesan cheese (for breading)
- 1 teaspoon garlic powder
- 1 teaspoon onion powder
- Salt and black pepper to taste
- 1 cup Caesar dressing (homemade or store-bought)
- 12 slices Provolone or Mozzarella cheese
- 4 tablespoons unsalted butter, melted
- 1 tablespoon fresh parsley, chopped
- Vegetable oil for frying (if not baking)
Directions
- Preheat your oven to 375°F (190°C). Line a large baking sheet with parchment paper or foil.
- Set up a breading station with three bowls: flour seasoned with salt, pepper, garlic powder, and onion powder; beaten eggs; and Panko breadcrumbs mixed with 1/2 cup Parmesan cheese.
- Dredge each chicken piece in the flour, dip in the egg, and press into the breadcrumb mixture until fully coated.
- If frying: Heat oil to 350°F (175°C) and fry chicken for 3-4 minutes per side until golden and cooked through. If baking: Place on a wire rack and bake for 20-25 minutes, flipping halfway.
- Arrange the bottom halves of the Parmesan rolls on the baking sheet.
- Place a piece of crispy chicken on each roll bottom. Drizzle with Caesar dressing and top with a slice of cheese.
- Place the top halves of the rolls on the sliders. Brush the tops with melted butter mixed with parsley.
- Bake for 5-7 minutes until the cheese is melted and the rolls are toasted.
- Remove from oven, let cool slightly, slice between the rolls, and serve warm.
FAQ
Can I freeze these sliders?
Yes, you can freeze the cooked chicken separately for up to 3 months. It is not recommended to freeze the assembled sliders as the bread may become soggy upon thawing. Assemble and bake fresh for the best texture.
How do I reheat leftover sliders?
To maintain crispiness, reheat leftovers in an oven or air fryer at 350°F for 5-10 minutes. Avoid using the microwave, as it will make the breading rubbery and the bread chewy.
Can I use chicken breasts instead of thighs?
Absolutely. Just ensure you pound the breasts to an even thickness so they cook uniformly. Be careful not to overcook them, as breasts dry out faster than thighs.
Is there a substitute for anchovies in the dressing?
If you are allergic or dislike anchovies, you can use anchovy paste for a milder flavor, or omit them entirely and add a bit more Worcestershire sauce and capers to mimic the umami depth.
How long do these stay fresh?
Assembled sliders are best eaten immediately. However, leftover cooked chicken can be stored in an airtight container in the refrigerator for up to 3 days.
Summary
Indulge in golden crispy chicken and creamy Caesar dressing nestled between savory Parmesan rolls.
Perfect for parties or dinners, these sliders deliver maximum flavor and crunch in every bite.